This article will show you how to enable Fail2Ban with Parallels Plesk 12. This was one of the great new security features introduced with Plesk 12, allowing you to continually monitor log files and ban users who are trying to gain access to your system. Out of the box, this feature can monitor and ban:
- Apache authentication attempts
- Bad / Fake bots
- IMAP / POP connection attempts
- SMTP connection attempts
- Webmail connection attempts
- Plesk connection attempts
- FTP connection attempts
- SSH connection attempts
This provides a comprehensive set of services which are monitored and therefore can be protected against brute force hacking attempts.
Instructions
- To enable, login to your Plesk Control Panel with your administrator login.
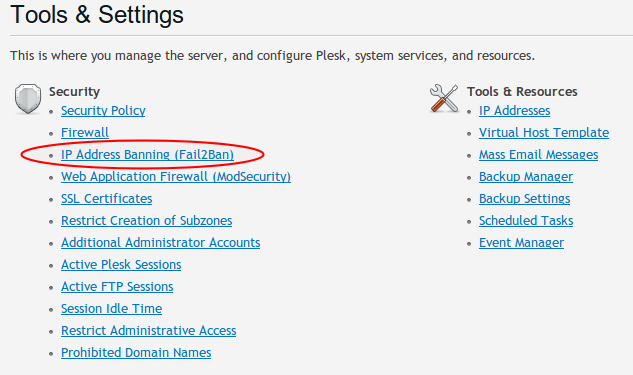
- Select Tools and Settings, then select IP Address Banning
3. Firstly, if you have a static IP for your office, you should add it to the Trusted IP Addresses. This is to prevent any accidental triggers of the rules. To do so, click on the Trusted IP Addresses tab and click on "Add Trusted IP":
Enter the IP of your office Internet connection.
4. Next, click on the Jails tab to enable / disable the particular services you wish to monitor:

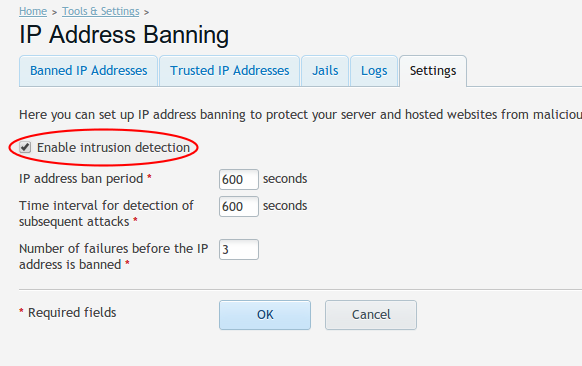
5. Once you're happy with the selected Jails, you can now enable the banning. Click on the Settings tab
6. Click the "Enable intrusion detection" checkbox. You can also adjust how long the IP is banned for and also how many failures it requires before triggering a ban. Click OK to enable.
7. You now have Fail2Ban running on your Plesk Server.
8. All IP's which are currently banned (and what triggered the ban) are viewable within the main screen.

(If you don't see any IP's listed here, it means nothing is currently banned)
